
Nivalis Nights has a photo mode for composing pictures of the city and its residents. Open Photo Mode from the game menu, position the camera, choose the framing you want, and use the capture action shown in the interface. For a quick record of something happening in front of you, a normal screenshot is also useful: setting up a composed photograph takes more time.
The most reliable way to learn your controls is to take one simple test picture before planning a longer shoot. That checks three separate things: you can enter the mode, you understand the camera controls displayed in your build, and you can retrieve the result afterward. Once those work, concentrate on your subject and composition.
Open Photo Mode and Take a Test Picture
Start somewhere with a clear subject, such as a building frontage, a sign, or an NPC standing nearby. Enter the game menu and choose Photo Mode. Use the controls and prompts displayed there; opening the menu avoids having to guess a dedicated camera shortcut.
Before changing several options, look at the initial view. Identify the action for taking a photo and the controls for moving or adjusting the camera. A camera interface can contain settings that change the picture rather than move the viewpoint, so distinguish those before experimenting.
Take a straightforward first picture. Keep the subject near the center and leave the other settings alone. After capturing it, check where that result is available in your current setup. Finding the first photograph now is more useful than taking a large series and only then discovering that you do not know how to retrieve them.
Position the Camera Before Changing the Lens
Camera position and framing solve different problems. Moving the viewpoint changes which surfaces are visible and how objects overlap. Changing a lens or field-of-view setting changes how much of the scene fits in the picture. Begin with the position so that you do not spend time adjusting a wide view of an obstructed subject.
For a street scene, decide whether the important part is the street itself, the buildings above it, or a smaller detail. Change the camera's height and direction to make that choice visible. A low view can give more space to the skyline; a higher view can make a street layout easier to read.
When photographing a person, pay attention to the background as well as the face. If a bright sign, railing, or pole seems to emerge from the subject's head, try a different camera position. This is a composition choice, not a requirement for unlocking the camera.
Leave room around the subject before making the final crop. A photograph that barely includes the top of a building or the edge of a face gives you less flexibility when you later use a different frame. Take a wider alternative if you are unsure which framing you will prefer.
Choose the Frame for the Intended Result
Frame shape matters before you take the picture. A wide city scene and a portrait for a narrow picture frame do not use the available space in the same way. If the interface offers a Frame selector, choose the shape that suits the result rather than treating the default as the only option.
Portrait framing, including a 9:16 option demonstrated in play, is useful for tall signs, towers, and a standing character. A landscape view gives more room to show a street or a building with its surroundings. Changing the frame can remove part of a composition, so check the edges after switching.
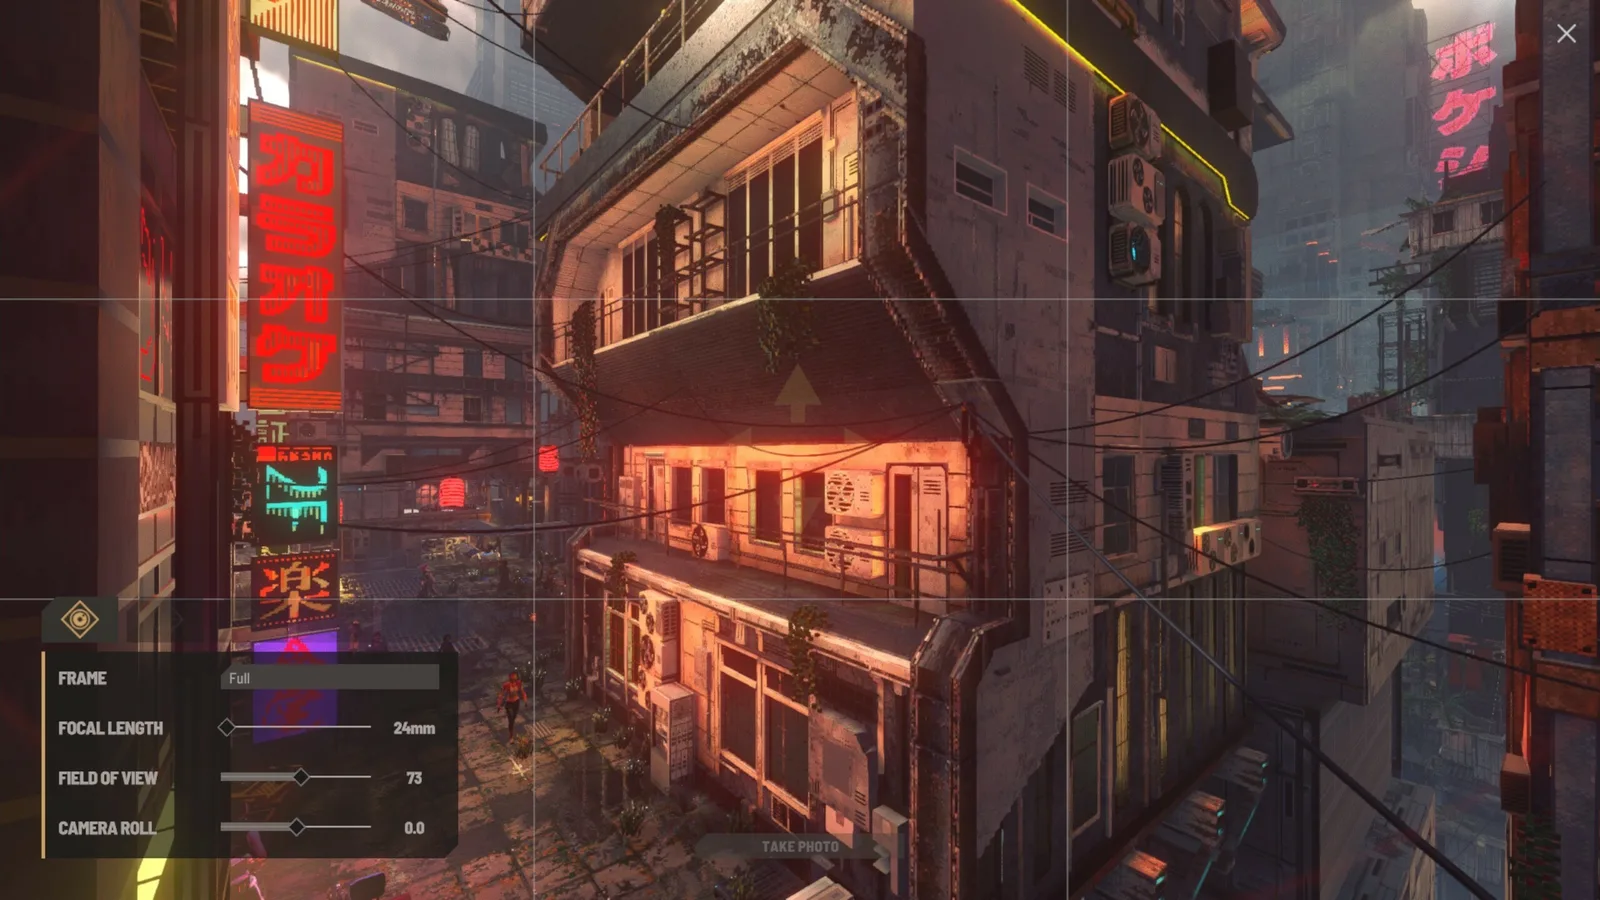
This earlier official interface illustrates framing and view adjustments. Follow the controls displayed in your current game; the pictured values are not a required preset.
The camera illustration shows a framing grid beside Frame, Focal Length, Field of View, and Camera Roll controls. The displayed numbers describe that particular picture. They are not required settings or a preset you must reproduce.
A grid can help you place a horizon or keep a vertical subject aligned. It can also make it easier to notice that the important detail is too close to an edge. Use those guides to assess the picture, while judging the final image by the subject you want viewers to notice.
For an in-game picture frame, make a version with generous space around the important detail. A photograph can fit the screen beautifully and still lose part of its subject when placed into a differently shaped decorative frame. Matching the intended frame shape at capture time reduces that risk.
Adjust the View Without Losing the Subject
If your photo interface provides focal length or field-of-view controls, use the preview to judge their effect. A wider view includes more surroundings. A narrower view gives the selected subject more space in the finished composition. Neither setting is automatically better for every part of Nivalis.
For a city photograph, a wide view may preserve the relationship between the street, nearby buildings, and the skyline. Check whether the subject remains easy to identify. If everything becomes small, choose a simpler scene or narrow the framing until the main feature reads clearly.
For a portrait or sign, a tighter view can remove distractions at the edges. Be careful about cutting off details that explain the subject. A close picture of an illuminated word is a different result from a photograph showing the entire storefront around it.
Camera roll changes the orientation of the composition when that control is available. Begin with a level view so that you can evaluate the scene clearly. Try a tilted alternative only if the angle contributes to the picture you want. Keep the level version as a comparison instead of assuming that a more dramatic angle is always an improvement.
Set Focus and Appearance After Framing
Once the camera position and frame work, consider the appearance controls offered in your build. An earlier official interface includes a filter, focus distance, aperture, and grain.
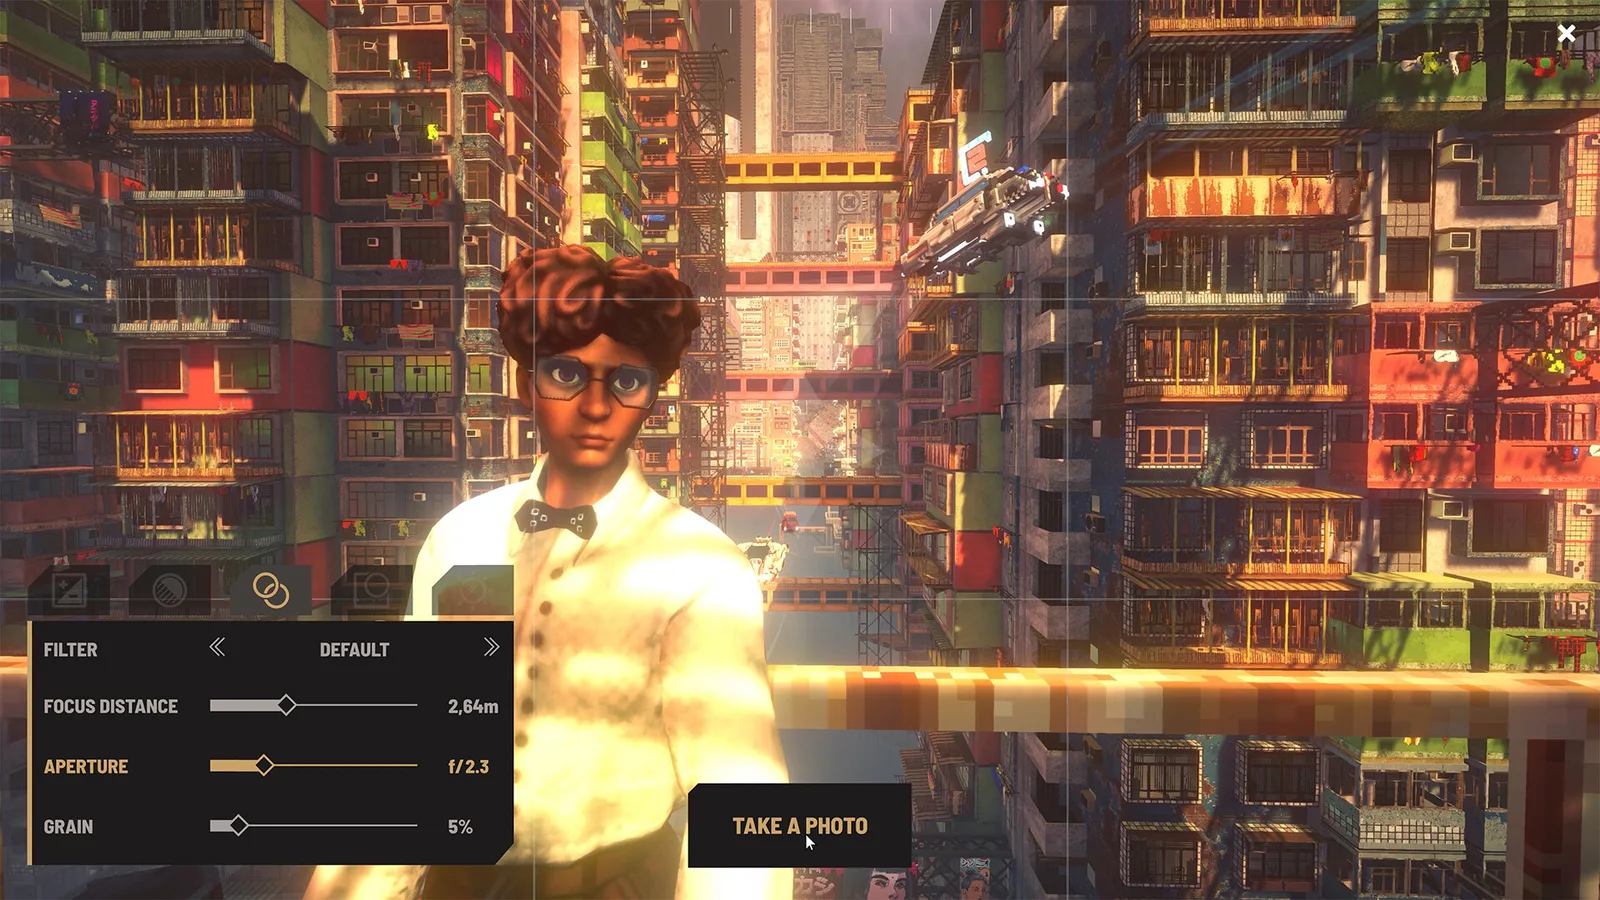
Focus and appearance controls are shown in an earlier official interface. The subject is an NPC, and the layout may differ in your build.
The illustrated subject is an NPC. Photographing a resident does not mean that the game has opened an editor for your own character. Photo Mode composes an image of the scene; it does not create a customizable player avatar.
When focus controls are available, identify the part of the picture that needs to remain clear. For a face, judge the face in the preview. For a sign, judge the lettering. Changing focus without looking at the subject can produce a picture where the background is clearer than the detail you intended to show.
Use aperture controls, if present, to compare how much of the scene appears sharp. A portrait may benefit from separating the subject from its surroundings, while a city view may need several layers to remain legible. Evaluate the preview rather than copying the aperture number from an example image.
Filters and grain change the look of the image. Make a plain version first, then compare an alternative treatment. This gives you a useful reference for deciding whether the effect helps the picture or obscures details. A sign with carefully chosen lettering or a small face may become harder to read under a strong visual treatment.
Capture Alternatives You Can Compare
When the scene is ready, use the photo action displayed in the camera interface. Start with the composition you have already checked. Then make one or two purposeful alternatives: a wider frame, a portrait version, or a different focus choice.
Change one setting between alternatives when possible. If you move the camera, switch the frame, and change the filter together, it becomes harder to tell which adjustment improved the picture. Comparing two similar shots is more useful than taking many unrelated versions of the same subject.
Before moving on, inspect the boundaries of the frame once more. Check for clipped signs, faces at the edge, and foreground objects hiding important details. These small checks are particularly useful when the image is intended for an in-game display, where later cropping may be less flexible than you expect.
Verify Photo Output in Your Playing Environment
The reviewed sources do not establish a complete screenshot-save directory for the current game build. This guide cannot give you a confirmed folder path. After your first capture, verify the output in the environment where you are actually playing. A local installation and a streamed session can give you different routes to the resulting image. Do not assume that another player's computer folder is also the correct destination for your setup.
Cloud streaming adds another consideration. The game may be running on a remote machine, so a picture saved there may not appear in a folder on your device. A local screenshot of the composed view can provide a separate copy through the capture method you control. Check that result before relying on it for a large collection.
If you cannot find a picture, repeat one simple capture and note which action you used. Search for that output first. This is more informative than repeatedly photographing different scenes without confirming whether the capture action is producing a retrievable result.
Use a Photograph in an In-Game Frame
Photos can be selected for picture frames in your apartment. Once you have a usable capture, choose it through the frame's image selection. The useful photography question is whether the picture's shape and subject suit that frame.
Check the displayed result after selecting the photo. A tall frame can crop a wide image in a way that removes the detail you wanted to show. If the placement interface does not let you select the crop you need, return to Photo Mode and take a version composed for that frame's shape.
Center the indispensable detail and allow extra space around it. For a portrait, that might mean keeping the face comfortably inside the frame. For a building, it might mean preserving the sign and entrance together. The aim is to make the picture survive the display's crop, rather than filling every edge of the original capture.