
To steal usable furniture or appliances in Nivalis Nights, wait until curfew, pick up an eligible item inside a rival business, and carry it to a business you own. Place it there before trying to store it. Picking something up in the rival's shop does not put it directly into your inventory. The destination, the walking route, and somewhere to sleep afterward all matter.
This is a night operation with security consequences, rather than a normal shopping interaction. Security Awareness rises as you take items or remain exposed to security lights. Start with one object and a nearby receiving shop. Keyboard instructions below use the reported default controls; check your bindings if the displayed prompts differ. Individual item eligibility and detection behavior can change between game updates.
Prepare the Receiving Shop Before Curfew
The most useful preparation is to decide where the stolen object will go. Choose a business you own near the rival you intend to visit. You will have to carry the object between the two locations, so a destination somewhere else in the city does not solve the immediate problem. A nearby shop makes it easier to learn the placement sequence without adding a long night walk.
Clear a suitable space in that shop before the operation. The transfer requires placing the object at the destination, not merely reaching the doorway with it in your hands. An appliance needs somewhere it can be set down. A chair removed from around a rival's table may require an available position around one of your own tables. Treat the receiving layout as part of the route, especially if your restaurant is already crowded.
Choose an object for which you have a clear purpose. Taking an appliance you can use is different from taking an object solely to sell. Both uses have been reported, but neither provides a fixed amount of profit. The object, the selling opportunity, and any consequences affect the result. For a first attempt, understanding the transfer is more useful than trying to empty an entire restaurant.
Before the countdown ends, identify these three stops:
- The rival business containing the intended object.
- Your nearby business, including a usable placement space.
- An accessible place in the district where you can sleep after the transfer.
Walk the first part of the route while it is easy to see. Notice the receiving doorway and any narrow passages you will have to negotiate. A refrigerator can obscure much more of the view than a small furnishing. You want to recognize the route when your hands are full, rather than depend on finding it for the first time during curfew.
Begin the Pickup After the Night Transition
Move into the rival business before curfew if you can. Starting inside removes the extra approach through the night security lights. You still have to make the trip out with the object, but you avoid turning the first attempt into two separate crossings before you have learned the controls.
Allow the curfew countdown and the end-of-day summary to finish. The reported theft sequence starts after that transition, when you return to the position where you left your character. Standing inside a rival business during the day and seeing ordinary furniture is not enough to establish that the theft interaction is currently available.
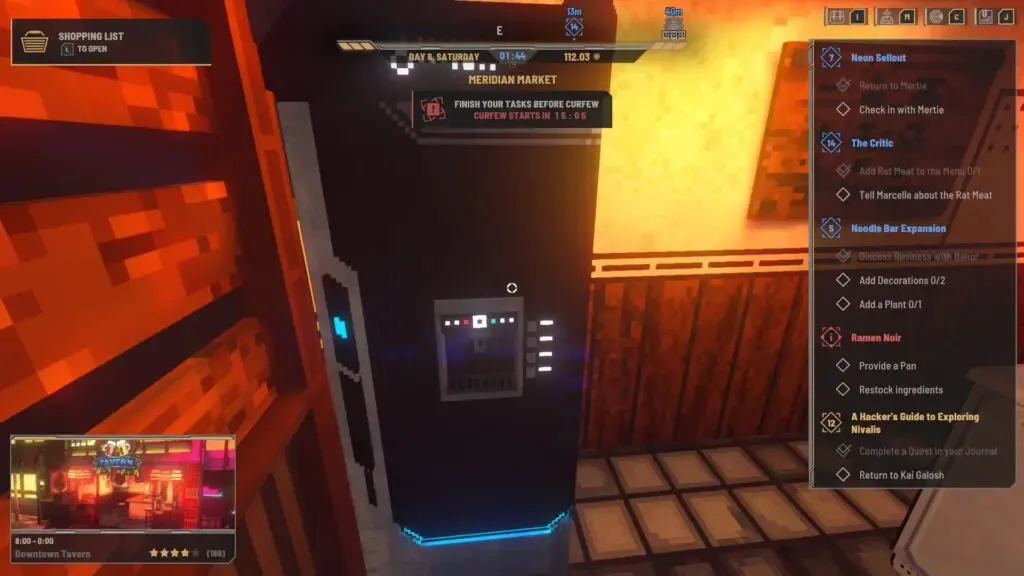
Reach the target before the night transition, then follow the pickup prompt after curfew.
Use the furniture pickup control on the selected object. The reported keyboard binding is X. Appliances, counters, tables, and chairs are among the objects described in the theft walkthrough, but that does not mean every object in every business is movable. Look for the interaction your current game actually offers. If an object cannot be picked up, choose another eligible target rather than assuming the entire night system is broken.
Once the object is held, concentrate on delivering that one item. Do not expect the rival's furnishing to behave like an item you already own. The inability to store it immediately is a key part of the transfer sequence: you must physically bring it back to your own premises first. Repeatedly trying the inventory action at the original location leaves out the required destination step.
Complete the Transfer at Your Own Business
Use this order for the first delivery:
- Pick up one eligible object after curfew has started.
- Carry it out of the rival business and follow the prepared walking route.
- Enter a nearby business you own.
- Place the object in a valid space inside that business.
- If you want it in storage, pick it up again from the receiving shop and use the inventory action.
The reported keyboard-and-mouse inventory action is right-click after picking the item back up. Use the current prompt or your rebound control if your setup differs. The important distinction is the location and order: carry, place at your own business, then pick up and store. A failed attempt to store the object at the rival's location is not evidence that the later storage step will also fail.
For a chair, check the receiving table arrangement before changing the route or trying a different store. An empty patch of floor is not necessarily the same as an eligible chair position. If the chair came from a table arrangement, leave room around one of your own tables so you can complete the placement step. Avoid using a chair as your first target if you have not yet prepared that space.
Confirm the destination step before returning for another item. An object still in your hands has not completed the same sequence as one placed successfully in your shop. Learning whether placement and storage work on a single delivery gives you a useful checkpoint. Taking several objects without resolving that first interaction makes it harder to identify where the process went wrong.
Read Security Awareness While Carrying the Object
Stealing and security exposure contribute to the night's risk. Keep the Security Awareness display in view and watch how it changes during the actual attempt. Exact additions per item and detection timing should not be treated as universal values: reported behavior varies with the security level, and older reports do not establish a permanent safe threshold for the current build.
There is also a difference between the current night's awareness meter and the broader security level described by players. A route that felt forgiving on an earlier night may become less forgiving after repeated detection. Plan around the warning state you can see now. Do not keep standing under a light because a previous attempt appeared to allow a longer delay.
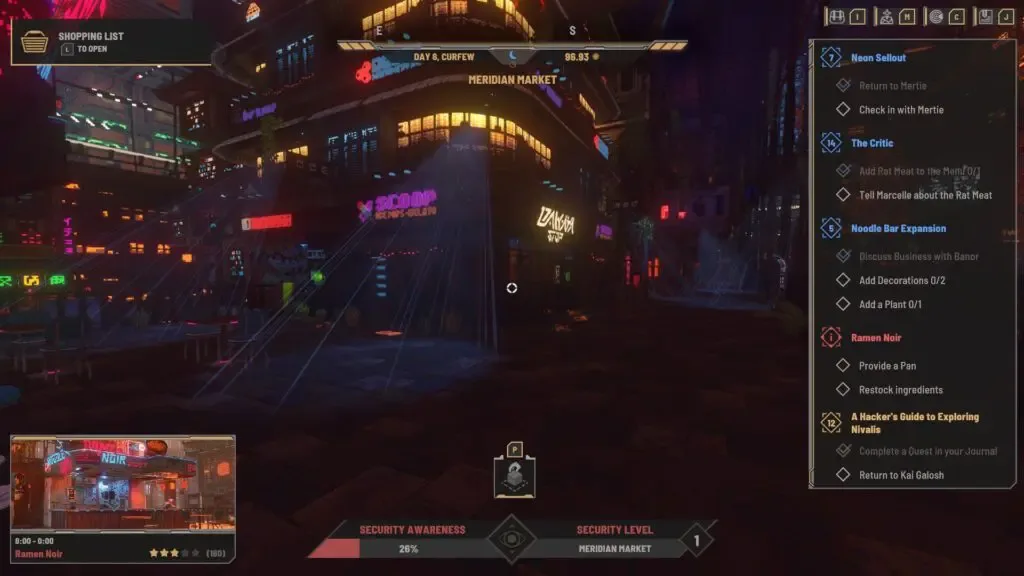
Watch the route and the current awareness meter before attempting another crossing.
Pause at a covered edge and watch the sweep before crossing an exposed section. The lights described in the walkthrough move in repeated patterns, and overlapping sweeps can leave short gaps. Look for a route along the edges and visible openings between sweeps. Moving through a gap you have observed is more reliable than sprinting into an intersection while a large object blocks your view.
A refrigerator creates a particular visibility problem: it can hide the ground and approaching lights. Observe the next crossing before committing to it. If you cannot see enough to judge the gap, stop at a position outside the sweep and reorient. A shorter route is useful only if you can understand its crossings while carrying the chosen item.
Older player reports describe further stealing becoming unavailable when the meter reaches its limit, with a fine appearing the next morning. They do not justify a fixed fine amount or a promise that detection has no other consequence. If the game stops offering the theft interaction, finish the night rather than continuing to search for an unlimited workaround. Reaching a sleeping place remains a separate task from taking another object.
Resolve Common Transfer Problems
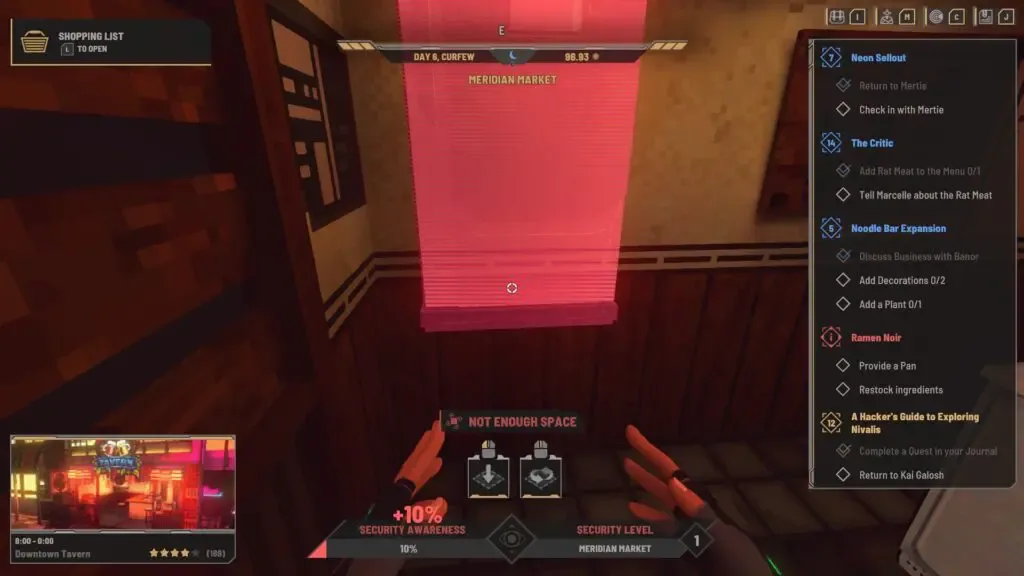
Check the receiving layout when placement fails; pickup and storage are separate actions.
Use the stage of the operation to narrow down a failed interaction. Pickup, delivery, placement, and storage are different actions, so the same symptom can have a different explanation depending on where you are standing.
Swipe horizontally to see all columns.
| Symptom | First check | Next action |
|---|---|---|
| The rival's object has no pickup interaction | Curfew transition and object eligibility | Wait for the night transition to finish, then try another eligible furnishing. |
| The object is held but will not enter inventory | Whether it has reached your own business | Carry it home, place it, and retry storage after picking it up there. |
| A chair will not fit at the destination | Space around your own table | Prepare a suitable position before attempting the chair placement again. |
| Awareness rises during the walk | Current exposure to a security sweep | Move out of the light and reassess the next crossing. |
| Further theft is unavailable late in the night | The current warning meter | Stop collecting items and make your way to a sleeping place. |
Keep changes small when troubleshooting. If the pickup works, there is no reason to replace that step with a different theory while you investigate storage. If placement fails, check the destination layout before blaming the entire theft mechanic. This stage-by-stage approach also helps distinguish an object-specific limitation from a problem affecting all eligible objects.
If behavior still differs from this sequence, record the held object, the receiving business, the visible prompt, and the game version before seeking help. Those details describe the actual failure. A report that only says stealing does not work leaves out whether the problem is entering the rival, picking up an object, finding a valid placement, or storing it afterward.
End the Operation with a Local Sleeping Place
Delivering the object does not advance the game to the next day by itself. You still need to sleep. Plan for a local night destination rather than relying on a normal taxi, train, or fast-travel trip back to your starting apartment. The reported curfew behavior restricts those options, which is why the sleeping stop belongs in the preparation stage.
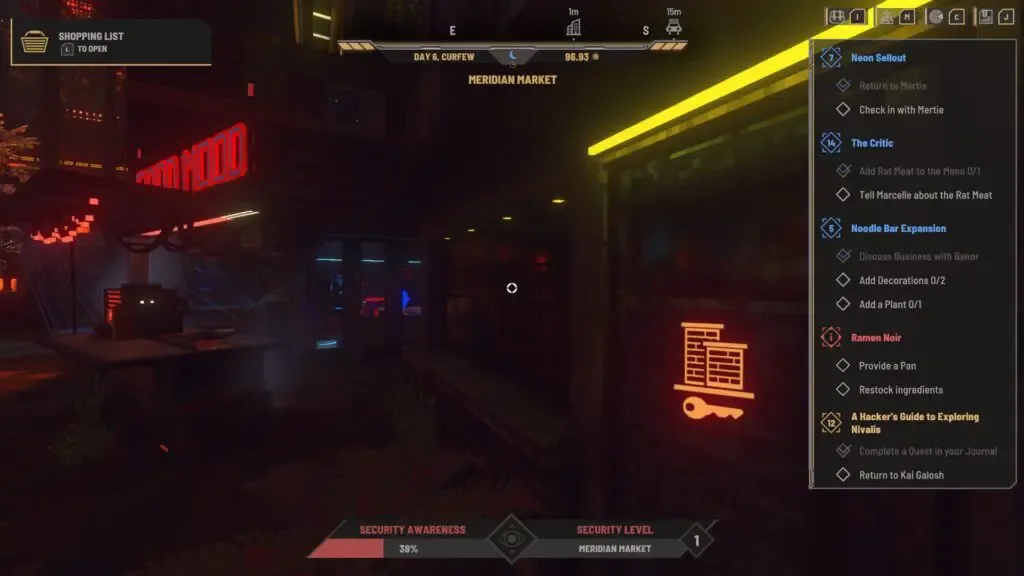
The night apartment entrance provides a local sleeping destination after delivery.
In Meridian Market, the described night apartment is near the Food Mood cart on the south side of the market, through a door to the cart's right. The scanner can help identify the entrance with an apartment symbol; the reported keyboard binding is C. Use the doorway and interaction visible in your game, since a daytime rentable apartment and a nighttime sleeping location should not be assumed to be interchangeable.
After sleeping, inspect the delivered item and any morning consequence before planning another operation. Players have reported police barriers around a targeted rival's business during the following day. Recovery timing varies across reports, so an inaccessible shop should not become the basis for a guaranteed next-day restocking loop. Choose the next target from what is actually accessible, and verify that your own receiving space is still available.