
Open the map with M, select a district you have already visited, and choose an available destination to fast travel. If the map says you must visit first, reach the area by its transport connection before trying again. If it says you need more Achievement Points, visiting is not the only requirement: complete the access progression and reach the threshold displayed on the district.
These two messages describe different obstacles. A visible district is not automatically an available destination, and a locked district is not automatically a broken travel point. Read its message before spending time at a taxi or metro platform that cannot yet take you there.
Use the map for a destination you already know
The city map is the main tool for repeat travel between areas. With standard keyboard controls, press M to open it. Inspect the destination rather than treating the entire city illustration as one unrestricted menu.
- Open the map while ordinary travel is available.
- Select the district you want to reach.
- Read any requirement or restriction shown for that district.
- Choose the appropriate available destination within the district.
- After arrival, check where you are relative to the person, venue, or route you actually need.
This last step matters because travel to a district is not necessarily travel to a specific quest giver. A street arrival can leave you near a transport point with a local walk still ahead. When more than one destination is offered, choose the one that matches the purpose of the trip.
Do not assume that every icon shown on the map is an active fast-travel option. The illustration includes the larger structure of the city, and access changes as you discover places and make progress. A map that shows an area can still tell you that it is currently unavailable.
Identify the reason a destination is locked
| Map state | What is missing | Next action |
|---|---|---|
| Visit-first message | The destination has not been discovered for fast travel | Find the taxi, train, or boat route that reaches it |
| Achievement Points message | Your progression does not meet the displayed access requirement | Check your points and the tourist-visa progression |
| District available, wrong arrival | You selected an arrival that does not match your local goal | Check the other offered destination before repeating the journey |
| Travel unavailable at night | The city's curfew restrictions may apply | Use a safe stopping plan rather than relying on daytime transit |
Read the text alongside the padlock. Two unavailable locations can require completely different work. Exploring an accessible place solves a discovery requirement; it does not substitute for the point threshold of a restricted district.
Likewise, a task marker is not permission to travel there immediately. The game can show information about something you will do later. If your intended destination is restricted, the useful question is what the map says you need, not how many times you can repeat the same interaction.
First visits use the city's transport connections
For a destination with a visit-first requirement, your initial journey is part of exploration. Taxis connect districts, metro hubs provide train routes, and an owned boat opens waterborne travel. Once you discover the relevant area, return to the map and check whether its repeat-travel option has become available.
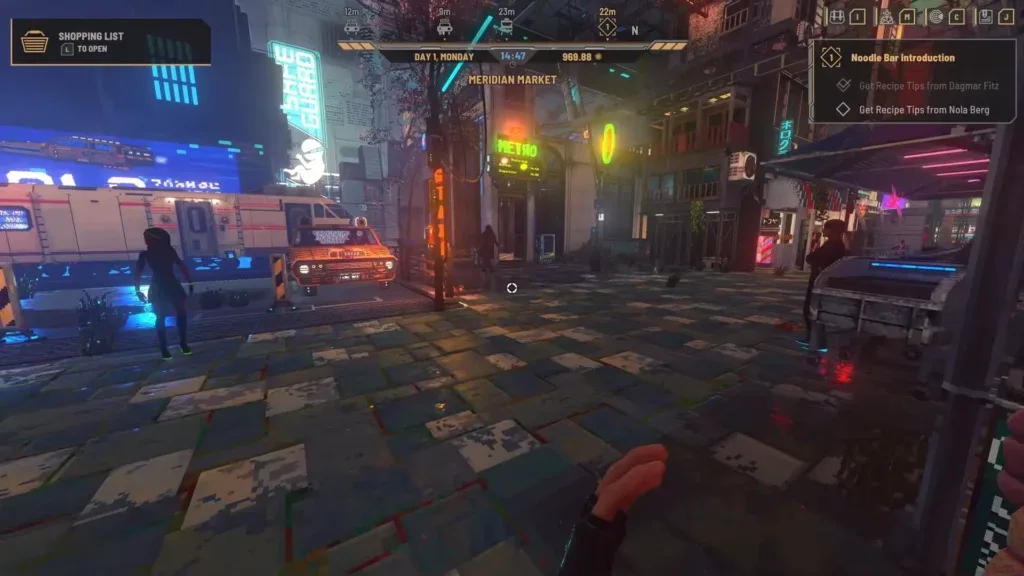
The taxi or station in front of you may not connect to the place you want. Read its destination before entering. If it offers the wrong route, look for the appropriate connection instead of assuming that waiting for another vehicle will change the service.
The Docks provides a useful example. An early route there uses the taxi connection that names the Docks; boarding a train that serves a different district will not complete the trip merely because it is another kind of transit. Check the destination label rather than relying on how close the vehicle is to your current position.
A map message requiring an initial visit can make it feel as though you are being denied the fastest option. That is the intended distinction: the first journey establishes a destination, while subsequent map travel reduces the repeated transport work. Plan to learn the connection once rather than attempting to bypass the discovery step.
Taxis are transport rather than player-driven cars
You can use the city's flying taxis to move between areas, but you do not directly drive those cars. Enter the relevant transport interaction and use the offered route. Trying to find flying controls for a parked taxi will not unlock fast travel.
This also keeps two different travel tasks separate. A taxi route can help you reach a new neighborhood, while the map can later take you back to a discovered destination. Neither requires running a taxi company or gaining access to a personal HOVA.
For ordinary planning, identify the destination first and the vehicle second. A visually convenient taxi is useful only if it serves your route. After arrival, remember the local connection so that you can recognize it again if map travel is not the option you need.
Metro travel similarly depends on the connection offered by the hub. The system is useful for reaching areas, but a station does not necessarily provide every destination shown across the entire city map.
Achievement Points are a separate access requirement
Some districts display a point requirement above their name. Selecting one can produce a warning that you need more Achievement Points to unlock that location. The number shown with the padlock is the requirement to compare with your current total.

Open the journal and inspect its Achievements tab to check your progress. The game's Achievement Points are an in-game progression resource; do not substitute a count of external platform achievement badges for that total.
Point-locked districts include later areas such as Mountain Town, Hive Mall, and Calypso Island. Use the threshold displayed in your own map rather than assuming that all restricted districts share the same requirement. The fact that one destination is accessible does not imply that the next one is ready.
These points connect travel access to activity around the city. Meeting people and vendors, completing quests, collecting postcards, identifying graffiti, catching fish, and growing crops are among the activities described by the progression system. You do not need to repeat a taxi trip indefinitely to make the padlock disappear.
Choose activities that already support your current goals. Completing a useful quest or exploring an accessible neighborhood can advance your broader routine while you work toward the next district. This is more purposeful than treating the point requirement as an unexplained delay at a transport terminal.
Complete the tourist-visa introduction when Ava offers it
A Hacker's Guide to Exploring Nivalis introduces the access progression through Kai Galosh. Follow Ava's lead for that quest rather than assuming the point counter alone explains every part of later district access.
The route begins with a train journey from Meridian Market to the Eastern Residential District. After arriving, follow the task toward Kai and speak with him. The conversation introduces the hacked tourist visa and the importance of becoming more active around the city.
The visa is not a promise that every destination becomes immediately available. Its purpose works alongside your Achievement Points. You still need to meet the requirement shown for a restricted district, and destinations that require discovery may still need their first visit.
Keep the quest, point requirement, and discovery requirement conceptually separate. Completing an access conversation, having enough points, and physically knowing a location are different kinds of progress. If one area remains unavailable after the conversation, read its current map message before deciding that the visa failed.
This route is included because it explains the transit lock, not as a directory of every character in the residential district. Use the active task to locate the relevant person instead of searching unrelated NPCs for a general travel upgrade.
Select the apartment destination when returning home
On the map, select Lowtown and check its available destinations. Choose the apartment entry when you want to return home; selecting the district's street arrival can leave a local walk ahead. This is an arrival choice, not another district unlock.
For the address, entrance, and sleep interaction, use the where to sleep guide. Check the home destination before nighttime restrictions affect your return.
Leave time for the local walk after arriving
The map is primarily a district-travel tool, not a detailed street plan of every shop and character. Fast travel can remove the long transfer between neighborhoods while still leaving a walk from a taxi rank, station, or other arrival point.
After arriving, check the active objective and its local marker. Do not board another vehicle merely because the quest giver is not immediately visible. First establish whether you have reached the correct district and need the final short route inside it.
Grouping tasks in the same area can make the travel network more useful. If two errands are local to one neighborhood, finish the relevant nearby work before selecting another district. That is route planning rather than an unlock rule; it reduces unnecessary repeat transfers without assuming the map can teleport you to any NPC.
The city is also not fully open at every visible level. Some background structures are scenery. An impressive section of the skyline does not automatically imply a selectable travel point or an entrance you have missed.
Use fast travel before curfew closes ordinary options
Curfew changes normal travel availability, so do not treat the map as an unlimited nighttime escape. Check the city clock and warnings before starting a new trip, especially if the destination still needs a first visit or a local search.
Return while the relevant travel option is available. If your plan is to sleep at the starting apartment, choose its map entry early enough to use it. If restrictions are already in effect, focus on the safe stopping options in your current area rather than repeatedly trying a disabled daytime route.
This is a boundary of the travel system, not a guide to avoiding every nighttime patrol. Detailed shelter locations and curfew actions belong to the sleeping and curfew pages. For transit planning, the important habit is to know your intended return destination before the last convenient journey.
Check these points when travel still seems wrong
If you cannot reach a destination, pause the repeated attempts and inspect what actually changed. Did you discover the district, meet the required point total, or finish the relevant access conversation? An increase in one kind of progress does not guarantee the other conditions are satisfied.
If travel succeeds but puts you somewhere unexpected, review the arrival you selected. A district-level street entry is different from the apartment destination. A transport hub is different from the person marked by your quest. Correcting the selected destination or taking the local walk is usually the relevant next action.
If an available interaction repeatedly fails in the same circumstances, preserve your progress with a manual save and record the location, map message, and action that triggers it. Those details distinguish a possible fault from a normal lock. Avoid spending Achievement Points effort or repeating long journeys until you have identified which requirement the interface is actually showing.